|
I tried this recipe about a week ago and found the flavor to be intensely bacon, but with a rustic sweetness that really helped pull the whole breakfast together. We managed to have leftover bacon b/c I experimented on a whole pound, which I used in homemade buttermilk biscuits the following morning. The sugary bacon flavor stood up to the dry muffin taste and we did not have leftovers that morning!
Ingredients 1 package SBM Bacon 1/2 cup packed brown sugar 1 tbsp cracked fennel seed 1 tsp rosemary (use a tish less if using ground) 1 tsp rubbed sage 1 tsp kosher salt 1/2 tsp white pepper Directions Mix all dry ingredients. Preheat oven to 300 degrees. With bacon thawed, lay flat on paper or kitchen towel and top with another towel. Press slightly to remove some of the water. Toss in the spice mixture being sure to coat everything but not pressing too hard so that the bacon releases more liquid which will dilute the rub. Take a rimmed baking sheet and cover with an oven-safe drying rack. Lay out the bacon on the rack. It’s ok if they touch a little. If there is extra spice mix rub it on any strips that look like they could use more. Cook for about 25 minutes. Be careful if any smoking occurs as this will taint the flavor. If the bacon smokes, reduce the temp by 50 degrees and add 10 minutes of cooking time. Remove when the edges have a leathery look and are just beginning to curl up. You can also turn the oven off and leave them in if you have other things to finish cooking. Serve as is or on a sandwiches for breakfast. Also a great addition to BLTs.
3 Comments
I haven't posted a recipe in awhile because we've been ramping up some marketing strategies for the farm. This includes teaching some cooking classes and putting a weekly newsletter into our patron's hands when we deliver. This recipe was our inaugural recipe for the newsletter and we heartily enjoy this meal in our own home. I know you will too!
Serves 8 fine folks... Ingredients 1 package SBMs Organic Rustic Breakfast Sausages 1 Large Yellow Onion - sliced thin I ea Red, Yellow and Green Pepper - sliced thin I lb White Cheese like Monterrey or Pepper Jack - grated I Package (8) Brat or Hoagie Buns (Fayze’s has some great Hoagie buns) 8 SBMs Free Range Eggs Directions Preheat oven to 500 degrees or “broil” setting. In a pan heat enough coconut (or comparable high heat oil) and coat the pan. At a high heat, add the onions and peppers and a tsp kosher or other non-iodized salt. Sauté until brown and a bit crusty. Pull the onions and peppers out and cook the sausages on medium heat until brown on both sides. Remove and deglaze with 1/4 white wine. When wine is reduced add onions, peppers and sausages back, cover and remove from heat, set aside. Whip the eggs with a tbsp water or milk and scramble in pan over medium heat with coconut oil or butter until light and fluffy. Set aside. Lightly toast sliced buns in oven and spread a layer of mayo and dijon (or stone ground) mustard. Add layer of egg and then the sausage and onion/peppers. Top with grated cheese and place in preheated oven until cheese is just melted. Be careful to watch any exposed bread as it will burn quickly. Serve with hash browns or grits. Enjoy! Well, we couldn't be more excited here at St. Brigid's Meadows for our Packer crew! In honor of the great game coming next weekend, I've come up with some fun recipes for you if you are planning on hosting a party. Actually, they're pretty good even if it's just you and the kids on Super Bowl Sunday (like us) or for any day you feel like indulging in fun finger food.
Game Day Burgers Makes about 8 quarter pounders or about 12 "Sliders" 2 lbs ground St. Brigid's Meadows’ [SBM’s] grass-fed beef 1 tbsp course ground rock salt 1/2 tbsp garlic powder 1/2 tbsp onion powder 1 tsp medium ground black pepper 2 tbsp Worcestershire sauce 1 SBM’s free-range egg Mix all ingredients together with your hands. Below are three variations for the burgers: In a pan: Heat pan at medium heat. Add two tbsp butter, pat patties about 1/2 inch thick and 4 inches wide. Liberally salt both sides and lay in pan. If the butter starts to brown, turn the heat down a bit. Flip after 2 minutes (or brown) and cook for another 2 to 3 minutes. Serve immediately for medium rare or let sit in pan covered for 5 minutes for a juicy medium well. Lightly salt a third time and add to toasted bun with bacon, mayo, ketchup, mustard, lettuce, tomato and thin sliced onion. On a grill: Turn grill to high or prepare a "hot zone" charcoal setup, rub a thin layer canola oil on prepared patties and put on hottest part of grill. Cook for two minutes both sides and transfer to cooler part of grill for additional two minutes for a juicy medium. Lightly salt a third time before placing on grill toasted bun with your favorite fixings. Stuffed Sliders: Place two pieces of plastic wrap longways and overlapping 1 inch on the long side. Spread hamburger mixture onto wrap and lightly oil hands and press the mixture down being careful to keep the meat together. Lightly oil a rolling pin and roll the mixture out to 1/4 inch. Put a thin layer of any or all of the following: - shredded cheese - grilled onions - jalapeños - thin sliced, sautéed mushrooms lightly cooked bacon Fold one side onto the other and softly roll out so the mixture is even. Cut with a pizza cutter to 3 to 4 inch squares and place in a buttered pan on medium heat. When all burgers are finished cooking take small buns ("silver dollar", dinner rolls) sliced and place face down in the hot butter and healthy grass-fed grease. Top with burger and slather with a fattening decadent condiment and cooked bacon. Chicago-Style Dog We trounced 'em, we can honor their food! 1 pack SBM’s All-Beef Franks Fresh, brat buns 1 large yellow onion 1 each red, yellow and green pepper 1/2 tbsp medium ground salt 1 tsp medium ground pepper blend 2 roma-type tomatoes 2 bottles strong flavored German beer (such as Beck's) Simmer franks on low in beer for about 45 minutes. While simmering, slice and sauté onions and peppers with salt and pepper, keep warm and set aside. If grilling, sear franks for about 2 minutes and place in toasted brat buns with a smear of mayo. Top with onions, peppers and freshly sliced tomatoes. Add stone ground mustard (optional). Quick'n'Easy Meat Bombs 1 pack SBM’s All-Beef Franks Approximately a 1/2 lb organic Smoked SBMs Bacon Set oven to 350. Slice franks into 1 inch pieces and bacon into roughly 2 inches pieces. Wrap bacon around frank and skewer with a tooth pick. Other interesting things you can shove in there: - jalapeño slices - onion slice - chicken liver (trust me, it's tasty) - thin apple slice - more meat. Just because. Place mini-meats on a pan and roast for about 15 minutes or until bacon is slightly brown and the edges curling. Drown in barbecue or wing sauce, or lightly dust with kosher salt. Mini Pigskin Balls (laces out!!) 1 lb SBM’s Grass-fed Beef 1 cup finely diced yellow onion 1 cup sautéed mushrooms (drained of their cooking juices) 1 tbsp salt 1/2 lb SBM’s Organic Smoked Bacon, minced fine 1 SBM’s Free-Range Egg 1 tsp Thyme Preheat oven to 400 degrees and mix all ingredients by hand until fully incorporated. Roll into small ovals (roll into balls then rub them in your hands long ways briefly to elongate them to look like footballs) and place on a pan. Cook for about ten minutes or until the meat is just brown. Serve immediately as is or with a sauce. 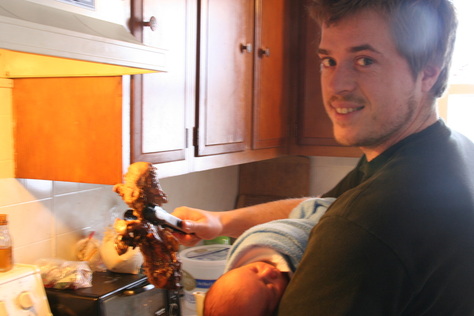 Sautéing a ham bone with our little Ham Bone. Sautéing is one of the most primary tools in a chef's arsenal. For that reason there are many misconceptions about what it is and what it is not. It is: A way to heat food to a point where it begins to excrete juices and thus heat and caramelize the sugars. It is not: A way to "seal in the juices" on a steak or roast. It does quite the opposite; as the food cooks, flesh breaks and cracks and actually allows the meat to release more liquid. It is: A technique that, when used in tandem with other methods can produce exquisitely rich foods. It is not: Simply relegated to chicken breasts, hamburgers and onions. Building on our lesson "On Cooking", sautéing makes principle use of heat and moisture control. High Heat - Searing Searing is used when you want to brown the outside of something. The "brown" is actually fond. These are the juices of the item that are being released quickly from the food. With the juices are all sorts of compounds like fats and sugars and vitamins. These become super concentrated in the high heat of the pan and bind themselves to the item being cooked. In addition, the food itself is cooking rapidly which produces some really delicious flavors and does some great things texturally. *sidenote* I'm sure you've heard this but it really is genuinely dangerous to cook on Teflon cookware. Virtually all of the world has outlawed Teflon and the U.S. will follow suit by 2015. Teflon has been proven to cause cancer. In order to properly sear you need to use an oil that can take a pretty high heat (this is not EV Olive Oil, this should only be used for low heat cooking. Rule of thumb, if your EVOO is producing smoke, it's giving you cancer) like canola or (ideally) organic coconut oil. With your pan on high, add your oil (enough just to coat the bottom of the pan) and give it a few seconds to come up "to temp". Salt whatever you are about to sauté liberally. The salt will help draw out more liquid ("lysing") and thus more flavor. Depending on what you are cooking it is vital that you do NOT move it too much. You are simply trying to produce that outer crust. If the pan is not hot enough or you are constantly flipping it over and over, you will not maintain the high heat that is necessary for searing. If you are searing a steak or a roast, it should stay untouched for about 2 minutes per side (if it is a big roast like a rolled rump or sirloin tip, think of it like a cube being sure to take the time to sear every side). You will know that it is done when it releases easily from the pan (the food will form a bond with the pan and once a certain temperature is achieved, the bond breaks. Try and pull the food before then and half your steak will stay firmly stuck to the pan). 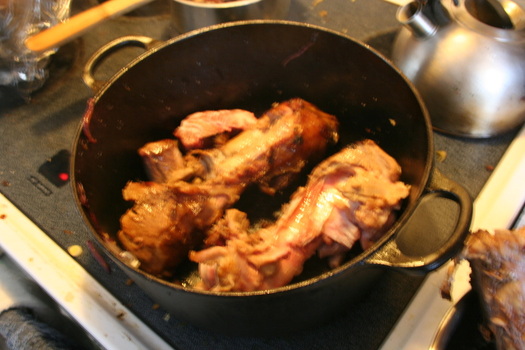 A dutch oven is great for sautéing odd sized pieces of meat. Here you see hog neck bones, ankles and ox tail. (Trust me, there's some great meat on these cuts) If you are searing veggies, lay out a thin layer of whatever you are cooking. It is important that as much of them touch the pan as possible. If any are sitting atop one another then they are steaming and that is a different process (covered later). Scrape the pan with a wooden spatula until the veggies are a uniformed brown. 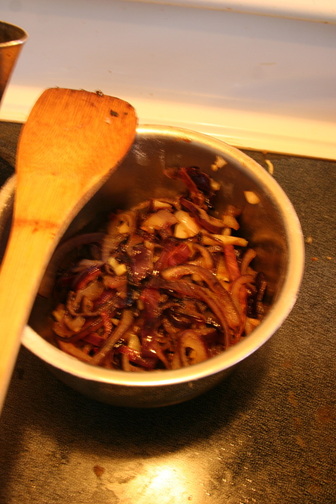 Finished seared veggies await their grand use. Here you see red onions and garlic. What to do with it...
At this point you have several options. Your steak is ready to eat or broil, your roast is ready to be braised in the oven (don't forget to deglaze and loosen up all those tasty bits at the bottom) and your asparagus is ready to plate. Sautéing is a great way to offer up some very hearty flavors into dishes that seem to lack depth. Adding sautéd onions to just about anything with up the savory factor by like a billion (give or take). Low Heat - Sweating Sweating is used for a few different reasons. Principally for caramelizing (onions) but also for softening or producing pan juices. Regardless of the reason for sweating, the focus is controlling the moisture. You want to release as much of it as possible and in the case of caramelization you then reduce that liquid to break down and gently brown the sugars (caramel). When cooking with a low heat a chefs options for oil increase. Now you get to use the really tasty stuff: butter, EVOO and a few unrefined (read, "flavorful") oils. Also, it is important to salt liberally. You want to pull out as much moisture as possible and the salt will help with that. The trick to sweating is really just to let the food rest in a slow quiet sizzle. You want to avoid browning and promote caramelizing. This can take in upwards of 20 minutes depending on how full the pan is. During this process it is ok to "crowd the pan". The heat from the bottom will help steam and soften the stuff near the top so when you stir it, the juices get released and worked into the dish. What to do with it... At this point those dark brown gooey caramelized onions are ready for that burger you just seared, the carrots can be drizzled with maple syrup for a sinful side and the cauliflower can be blended for starch-free mashed "potatoes". Sautéing is a real joy to master. Learning the unique flavors that are produced depending on the thing being cooked and the temperature of the cooking is both exciting and rewarding. Soon you'll be searing and sweating and sautéing all sorts of shnazzy things all in one pan to the joy and jealousy of all your friends. And remember: Love to cook - cook to love. I'm not even kidding.
When I was younger I was oblivious to the fact that many meals came out of a box (my mom doesn't read this so don't tell her I said that). One of my most favorite things was Bisquick Pancakes. Mom made them fluffy, Dad cooked 'em in bacon grease (love that man). When I got out of college and was on my own I was determined to learn how to make great pancakes from scratch. My first attempt was a limp flat floppy thing that was uninspiring to say the least. To make matters worse, every attempt with a different recipe after that ended the same way, ho-hum... Then I tried buttermilk pancakes. Hot diggity dog, now we were getting somewhere. They fluffed up more and certainly had that wonderful tangy flavor but I was convinced I could do better. Buttermilk recipes fluff up more because of the inclusion of baking soda or cream of tartar. This reacts with the natural acids in the buttermilk and creates enormous amounts of edible Scrubbing Bubbles (think, the vinegar and baking soda trick). These little bubbles push the batter higher and higher allowing the flour to set and form a strong matrix of delicious maple syrup soaking goodness (I mean let's be honest, this is the reason we all eat pancakes). Through the course of my culinary adventures, I stumbled across a substance that not only had more acid but was much better for you then store bought buttermilk. I give you... Real Milk Pancakes serves 4 to 6 Preheat your griddle to medium/high heat (approximately 350 degrees) Whisk together in a large bowl: 1 1/2 cups all-purpose flour 3 tablespoons sugar 1 1/2 tablespoons baking powder 1/2 teaspoon baking soda 1/2 teaspoon salt Whisk together in another bowl: 1 1/2 cups soured fresh milk (fresh milk can be found in many states and on a limited basis in Wisconsin. It is soured by setting out on the table for 3 days until it "splits" and the curds and whey begin to separate. This splitting happens because the acid level increases which is the same process for making cheese and is the reason that soured fresh milk works so well). Also, do NOT let store bought milk sit out and then consume. Pasteurized milk will not "sour", it will spoil. [Shake the soured, split milk in the container to reconstitute it. This can sit on your counter for up to two weeks to be used in baking. Discard immediately if any mold is present, this means that the reaction has stopped and the milk should not be consumed]. 3 tablespoons unsalted butter, melted 2 large eggs 1/2 teaspoon vanilla Pour the wet ingredients over the dry and slowly mix with a wooden spatula. You want it to be wet through out but not smooth. A batter with pea sized lumps is perfect. If you like a crusty "johnny cake" style pancake, drop a tablespoon bacon grease or butter onto the skillet now. Using a large spoon, drop large globs of batter onto the surface of the pan. You want to leave several inches between the pancakes as they will spread. After about 2 minutes, the batter will begin bubbling. When the bubbles are slowly popping (as opposed to just rising) the cakes are ready to flip. Using a spatula that covers the entire bottom of the pancake, give'er a flip. If the pancake spews gooey batter everywhere, she wasn't ready. You want a firm moist cake that doesn't splat. Cook for another minute or so and viola! The best pancakes this side of the Chatahoochie. If you are making a larger batch, preheat your oven to 200 degrees and put a pan in. You can drop your finished pancakes (and any tasty grassfed meats you've also made) in there while the rest of the cakes finish cooking. Serve with an offensive amount of butter and real maple syrup. Die and go to heaven. This item could be one that will be difficult to write; I do, however think that it is the most important. I could spend a lot of time detailing interesting recipes and helping you learn complicated techniques but it would all be a waste without a framework to put it in.
I am often chastised because I make something seem so easy to do and when someone with not as much experience tries, it doesn't come out perfect. Is this because I am such a better cook? Is it because I've tried and failed more times? I don't think so. I think it really comes down to understanding a few tenets about how food operates and therefor have a greater chance for success. Cooking is really only about controlling two things, Temperature and Moisture. Temperature Say you have a red hot burner and you put your hand on it. The heat that is contained in the burner is transferred into your hand and you feel hot. Conversely, if you grab a cold glass of water, the heat from your hand quickly travels into the glass and you feel cold. Make sense? Heat works like osmosis, it travels from a place of concentration (a hot thing) to somewhere with less (a cold thing). Seems rudimentary but here's where it get's interesting. When heat moves, it follows the exact pattern every time. It's like this. You have a full glass of water (this represents heat). You take it and pour a quarter of it into an empty glass (this represents a cold place, more aptly though a place with less heat). The water from the full glass is diminished by entering into the empty one. This is just like heat. When it travels from a place of concentration, the source then contains less heat. Here is why this is so important to cooks. If you are going to pan fry a steak and you drop it into a hot pan, it is going to brown but when you try and flip it and put it back in the same place it takes longer to brown. This is because much of the heat from the pan has entered the steak and it takes longer for the pan to heat back up. A more simpler example might be making hard boiled eggs. When you drop them in the boiling water, the water cools and temporarily stops boiling because of the temperature of the eggs. Understanding how heat works is one of the most important elements of cooking. It takes time and observation to learn it's quirks. However once you do you will be able to predict results and troubleshoot problems. Things like: "How much food can you add to a pan at one time?" or "Is this skillet too hot for these onions and will they char instead of sauté" or "Is the volume of my sauce too much for this pot and the bottom is burning while the top is lukewarm?" Pondering these things while you cook will help you to get a more realistic understanding about this physical property. For more info on it, research the principle "the conservation of heat." Moisture Control The other fundamental of cooking is learning how to control the flow of moisture in a dish. It works hand in hand with the property of the conservation of heat because temperature change immediately effects liquids. All things contain various amounts of water; from steaks to greens to mushrooms to pomegranates. It is how you control that moisture which will dictate your culinary success. Water can be a very difficult element to control. It can have very positive or very negative effects on what you are preparing. For instance, if you are trying to cook a perfect over-easy egg you would want to drop a tablespoon of water in the pan and cover it to lightly cook the top. However, if you added a cup, the water would draw all of the heat from the pan and your eggs would be a mess. Or, if you add too much liquid when you are braising (and the meat releases it's own juices) you might boil the meat instead of braise it (shoe leather anyone?). Observing how moisture affects cooking is not easy but in reality that and heat work together. Watching how they interact with one another is a great benefit. It could tell you why your greens didn't wilt properly or why the pancakes burned or why your chicken-fried-steak chews like a dog toy. I would encourage anyone seeking to become a better cook to work this observation process into your food preparation ethos, you will undoubtedly hone your craft and produce higher quality food. Braising. Man, I can only think of a few other techniques that have been so horribly bastardized. When people think of cooking slow and low, usually they take a hunk o'meat and throw it in the crock pot all day covered in water. The end result is often an overly tough or slimily moist mystery. But braising, oh buddy, braising is special. The principle is not all that different from crock potting but the end result isn't even in the same league.
At the core of braising is cooking with a low heat for an extended period of time (usually 250-300 degrees for 3-4 hours). It is the same principle actually as slow barbecuing. You want a slightly moist heat. This technique has been used for hundreds of years to make lower quality cuts more palatable. But we're not doing this just to use up that freezer burned chunk of chuck in your freezer. No way, braising can produce flavors and textures that you only hope you could taste let alone reproduce. And guess what, you can. Even better? It's actually quite easy. Imagine a pot roast that you can cut with a fork AND slice with a knife (and have it not fall apart) all the while being perfectly juicy and tender. Or a weird cut like oxtail or shanks that is impossible to cook any other way and comes out so rich that you'll get all poetic at the table. So here's the rules, just don't violate them and everything will come out peachy. 1) Slow and Low - Just have to reiterate it, it's kinda integral. 2) Sautee your cut and veggies - this produces "Fond" or the tasty charred bits at the bottom of the pan 3) Deglaze (add liquid) - bring to a boil to release the fond. Reduce to half (this is your brasing liquid) 4) Cover and Cook (yup you guessed it) Slow 'n' Low. The end result can be devoured right off the bone, or pulled off and shredded for sandwiches. Give it a try, you'll be so happy you did. 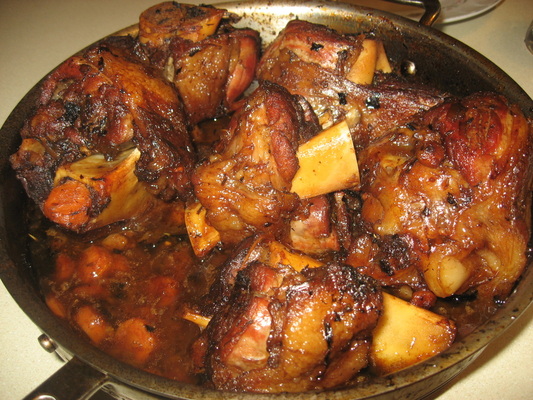 Braised lamb shanks fresh out of the oven, ready to devour! *See "On Braising" for more info on this time (not labor) intensive technique*
Poor shanks, no one likes them cause they think they are hard to cook. They're not, in fact, if you have the time. They are one of the easiest ways to have a positively heavenly meal without breaking a sweat. The reason they are so maligned is because they are all tendon and hard muscle. However, given a long, slow cook with just a little moisture, the tendons not only break down but the joints release that magical substance, collagen, that does seductively savory things to your palate. I daresay that braised shanks are my very favorite winter dish. Serves 4-6 people; Prep Time: Total cook time: about 3 hours 2-3 lbs shanks - this should be about 4 shanks (I like smoked pork but you can use fresh pork, beef, lamb... anything with ankles really) 2 cups liquid (White wine goes good for pork, red for anything else. I've used tomato juice (with Italian seasoning to give an Italian flair). I've also had great success with apple cider. 1 cup stock (optional though really gives a much greater depth of character to the dish, oh, and it really doesn't even matter what kind you use though it will taste more "porky"/"beefy" etc if you use the corresponding stock to the meat you are braising) 1 large yellow onion (chopped to about 1/2" pieces) Kosher Salt and Fresh Pepper to taste Equipment wise, you'll need something that you can use on your stove top and bake with like a dutch oven or an all-metal frying pan with a top (no plastic or rubber!!) Pre-heat your oven to 300 degrees. Heat pan on high and add approximately 1 to 2 tbsp of a high heat, temperature-stable oil (pure coconut is best, NEVER cook with EV Olive Oil at a high heat, it is very unstable at those temperatures and becomes carcinogenic). Rub shanks with about 2 tbsp kosher salt and sear on all sides. You want a nice crust on the shanks. This should take about 1 1/2 minutes per side and up to 10 minutes total. Remove shanks and add onions. Saute at med/high heat until the onions are browning and soft. At this point there should be a good amount of dark charred bits at the bottom of the pan. This is called "fond" and learning how to use it can help you create some amazingly rich and deep flavored dishes. Add the two cups of liquid (deglaze). Once added, use a wooden spoon to scrape the bottom of the pan as it boils. Your goal is to release all the fond and get a clean pan. When the liquid has reduced by half you can add your stock. Bring back to a boil and add shanks to the now dark and lovely smelling onion liquid. Depending on what type of pan you are using you do not want more than 1/2" of liquid in the pan at this time. The shanks will drain as they cook, enriching your braising liquid. Give the liquid a taste at this point. You want it to be a little on the salty side. The salt will penetrate the meat as it cooks, tenderizing and flavoring. Add more if necessary. Add pepper to taste, cover and place in pre-heated oven. Set timer for 30 minutes. At the end of 30 minutes remove the pan (with mitts! Don't roll your eyes, I've done it more than once) and flip the shanks. Return to oven for another 30 minutes. Repeat the process FOUR (4) more times (yes four. Yes it takes 3 hours. Yes it's worth it.) Remove from oven after 3 hours of cooking (6 flips) and serve. Feel free to thicken the braising liquid to use as a gravy or leave it thin and serve in a bowl as a rich broth. * Variations * Italian With Beef and Lamb add 1 cup diced celery and carrots to the onions (this is called a Mirepoix "Meer-Pwah") when sauteing. Deglaze first with 1 cup diced tomatoes. Let them reduce until there is no liquid and then deglaze with 2 cups red wine. You can add a couple tsp of any Italian Spices (fresh basil, mmmmmm). Holiday Using any type of shank, add 1 cup diced apples or pears and 1 tsp cinnamon to the onions and deglaze with apple cider. The final result will be a little sweeter but have an intoxicating aroma. This is a great one for entertaining because it makes the house smell dreamy. Irish Stew Best with beef, add 1 tsp fresh rosemary to onions and deglaze with 2 cups dark beer (drink remainder). Guinness is a great standby but if you can find a unique micro, it will taste much more interesting. Halfway through cooking, add thickly chopped peeled potatoes and carrots. |
Archives
March 2012
Categories
All
|
 RSS Feed