|
Yeah baby, grilling season is officially here (though it of course never really stopped for the truly committed, but it's certainly easier this time of year). For those of you getting ready to dust off the ol' smokebox, I wanted to give you a crash course on this wonderful seasonal cooker.
First and foremost I have to say something. Cooking over an open flame has been shown to increase the carcinagenic levels in food. Every time you have fat and juices dripping onto the heat source, the vapor causes cancerous qualities. Always be aware when you grill to not drip directly onto the heat. Move the coals or put down a fireproof pan. In this two part series, I will attempt to give a well rounded view of factors that play into this delicate and delectable dance of food and flame. The first section will outline the basic and the second will focus more on food specific concerns. Cleanliness This is one of the easiest things to overlook when you are getting ready to cook but the fact remains, if you keep your grill clean and seasoned, it will produce better food. Period. Here are some things to remember. It is easier to scrape your grill when everything on it is crusted. You can do this when you are finished or just before you put new food on. Any gunk that is left on will not "add flavor," it adds stank. Oils and fats will become rancid and lend an off-flavor to anything left on. If you like a little more "grill-y" flavor to your food, clean it off with your scraper, just don't use the wire brush as much. Also, check any additional grills or surfaces that might be dirty as these will increase in temp and add an unsavory smokey flavor. Flair-Ups Flair-ups generally happen when an overly fatty or marinated item is put on the grill. The fat drains too quickly and is ignited by the heat source. Common culprits are ground pork and very fatty, well-marbled cuts like ribeye. Not only does the burned fat have a very distinct flavor that it adds to the meat (so much so that any somewhat knowledgable grill chef will know your error should you try to hide it) but if the flame reaches high enough, it can light the source and then you have a full scale emergency on your hands. A grease fire can spread very quickly. It is a good practice to have a large amount of baking soda or rock salt on hand to douse the flame, should they get out of control. Heat Zones All grills have heat zones. On a propane grill, even with all burners at 100%, will have places where it is much hotter or cooler than other spots. In charcoal or wood cooking, directly under the heat source is your hot zone. Cooking with Zones. Once you understand where your heat zones are you can use them to your advantage. Use your cooler zones (or turn the flame on propane grills down by 50%) to finish foods without burning them. These are also great places to melt cheese or cook other items that burn faster (like buns). Your hot zones are used to place those great "grill marks" on your food. This is really very easy and only has to be done on the presentation side of you want. Simply take your steak, burger, zucchini, whatever and glaze it with a thin layer of high temperature oil (read the "Oils" section for more info on what is a good choice) and dust with a layer of rock salt. Get your hot zone up as high as you can (500 to 600 degrees is best, check out "Temping" for how to know how hot your grill is) and use your wire brush to get every particle off (this can be painful work but a little pain is a testament to your tenacity)! Place the meat on the hottest part of the grill and leave it for about a minute and a half. Once that is done, turn the meat a 1/4 turn and place onto another open spot on the hottest part of the grill (that has not had food on it). After another minute and a half you can flip the steak or burger and continue to cook it on the hot part of the grill for rare to medium rare or transfer it to a slightly less hot zone (400ish) and finish to Medium/Medium Well. The ensuing "Ooohs" and "Aaahs" will make it so worth the effort. Temping This is a very vital skill. If you have a little money you can buy an infrared thermometer that you just point at the grill and it tells you how hot that spot is. If you're a bit more rustic like me, try this: The best way to temp your grill is to place your hand about a foot over it. If it is so screaming hot that you instantly have to remove your hand, your grill is pushing in upwards of 600 degrees. If you can have it on there very briefly you're probably around 500. If you can hold it for 1-2 seconds you're around 400, 2-3 at 300 and 5 seconds or so (depending on your tolerance), around 200. If you can keep you hand over it, check your propane or get a new batch of coals going in your chimney starter; your fire is out. Oils If you have been following me for any length of time, you know what I'm going to say. Don't cook at high temperatures with Olive Oil of any kind. It denatures, burns and becomes carcinogenic when it hit's is smoke point. You can cook at medium temps (300-400) with butter or lard but if you are grilling you really want a pure coconut oil. Try and avoid mutant "vegetable" oils as they are mostly soy and although Canola is an effective substitute, it is made of rapeseed with up to 80% of the cultivars used being genetically modified. Seasoning In my opinion, the only seasoning a good steak or burger or veggie needs is salt. I use Morton's Kosher salt but you can also use more exotic (read, expensive) types. Salt for most people is like wine. Buy the good stuff if you want to impress someone but chances are none of you will actually taste the difference. Salt liberally. Salt plays several roles during the cooking process. The initial and during applications serve to draw out minerals and sugars and help caramelize and use the food's own juice to flavor. Salting at the end (also known as adding, "Finishing Salt") is what gives you that great salt punch. This does amazing things for your palate and works with the food's own natural flavor. Almost universally people comment with horror over the amount of salt I use and then with euphoric praise when they try the food. Sodium is not bad for you. Processed foods with offensive amounts of sodium are bad for you. Also, it is a common misconception to use pepper while cooking. Pepper burns easily and can taint the flavor of the food. Only use pepper when pulling food off the grill or plating. Most spices will burn and not have the effect you want if you add them while you are cooking. Spices will add flavor while marinating but with relatively few exceptions, don't add spices while grilling. Grill Space This is a little different than "overcrowding" when sautéing. If you overcrowd a grill, everything will cook eventually. You do however, want to keep some open space so that you can move things in and out of Hot Zones in order to have greater control over your cooking. Stay tuned for Part 2 where I'll overview some great food specific topics.
11 Comments
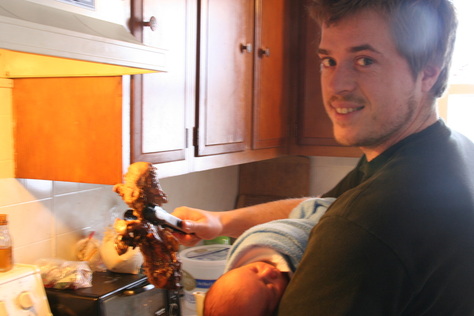 Sautéing a ham bone with our little Ham Bone. Sautéing is one of the most primary tools in a chef's arsenal. For that reason there are many misconceptions about what it is and what it is not. It is: A way to heat food to a point where it begins to excrete juices and thus heat and caramelize the sugars. It is not: A way to "seal in the juices" on a steak or roast. It does quite the opposite; as the food cooks, flesh breaks and cracks and actually allows the meat to release more liquid. It is: A technique that, when used in tandem with other methods can produce exquisitely rich foods. It is not: Simply relegated to chicken breasts, hamburgers and onions. Building on our lesson "On Cooking", sautéing makes principle use of heat and moisture control. High Heat - Searing Searing is used when you want to brown the outside of something. The "brown" is actually fond. These are the juices of the item that are being released quickly from the food. With the juices are all sorts of compounds like fats and sugars and vitamins. These become super concentrated in the high heat of the pan and bind themselves to the item being cooked. In addition, the food itself is cooking rapidly which produces some really delicious flavors and does some great things texturally. *sidenote* I'm sure you've heard this but it really is genuinely dangerous to cook on Teflon cookware. Virtually all of the world has outlawed Teflon and the U.S. will follow suit by 2015. Teflon has been proven to cause cancer. In order to properly sear you need to use an oil that can take a pretty high heat (this is not EV Olive Oil, this should only be used for low heat cooking. Rule of thumb, if your EVOO is producing smoke, it's giving you cancer) like canola or (ideally) organic coconut oil. With your pan on high, add your oil (enough just to coat the bottom of the pan) and give it a few seconds to come up "to temp". Salt whatever you are about to sauté liberally. The salt will help draw out more liquid ("lysing") and thus more flavor. Depending on what you are cooking it is vital that you do NOT move it too much. You are simply trying to produce that outer crust. If the pan is not hot enough or you are constantly flipping it over and over, you will not maintain the high heat that is necessary for searing. If you are searing a steak or a roast, it should stay untouched for about 2 minutes per side (if it is a big roast like a rolled rump or sirloin tip, think of it like a cube being sure to take the time to sear every side). You will know that it is done when it releases easily from the pan (the food will form a bond with the pan and once a certain temperature is achieved, the bond breaks. Try and pull the food before then and half your steak will stay firmly stuck to the pan). 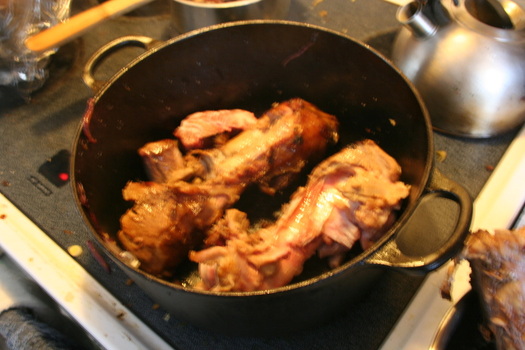 A dutch oven is great for sautéing odd sized pieces of meat. Here you see hog neck bones, ankles and ox tail. (Trust me, there's some great meat on these cuts) If you are searing veggies, lay out a thin layer of whatever you are cooking. It is important that as much of them touch the pan as possible. If any are sitting atop one another then they are steaming and that is a different process (covered later). Scrape the pan with a wooden spatula until the veggies are a uniformed brown. 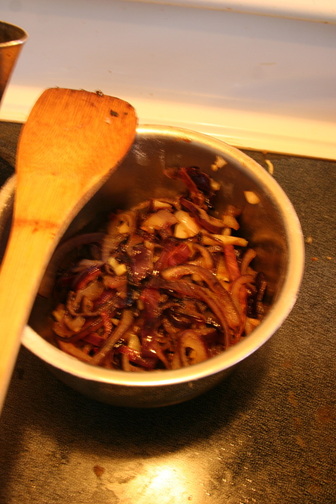 Finished seared veggies await their grand use. Here you see red onions and garlic. What to do with it...
At this point you have several options. Your steak is ready to eat or broil, your roast is ready to be braised in the oven (don't forget to deglaze and loosen up all those tasty bits at the bottom) and your asparagus is ready to plate. Sautéing is a great way to offer up some very hearty flavors into dishes that seem to lack depth. Adding sautéd onions to just about anything with up the savory factor by like a billion (give or take). Low Heat - Sweating Sweating is used for a few different reasons. Principally for caramelizing (onions) but also for softening or producing pan juices. Regardless of the reason for sweating, the focus is controlling the moisture. You want to release as much of it as possible and in the case of caramelization you then reduce that liquid to break down and gently brown the sugars (caramel). When cooking with a low heat a chefs options for oil increase. Now you get to use the really tasty stuff: butter, EVOO and a few unrefined (read, "flavorful") oils. Also, it is important to salt liberally. You want to pull out as much moisture as possible and the salt will help with that. The trick to sweating is really just to let the food rest in a slow quiet sizzle. You want to avoid browning and promote caramelizing. This can take in upwards of 20 minutes depending on how full the pan is. During this process it is ok to "crowd the pan". The heat from the bottom will help steam and soften the stuff near the top so when you stir it, the juices get released and worked into the dish. What to do with it... At this point those dark brown gooey caramelized onions are ready for that burger you just seared, the carrots can be drizzled with maple syrup for a sinful side and the cauliflower can be blended for starch-free mashed "potatoes". Sautéing is a real joy to master. Learning the unique flavors that are produced depending on the thing being cooked and the temperature of the cooking is both exciting and rewarding. Soon you'll be searing and sweating and sautéing all sorts of shnazzy things all in one pan to the joy and jealousy of all your friends. And remember: Love to cook - cook to love. This item could be one that will be difficult to write; I do, however think that it is the most important. I could spend a lot of time detailing interesting recipes and helping you learn complicated techniques but it would all be a waste without a framework to put it in.
I am often chastised because I make something seem so easy to do and when someone with not as much experience tries, it doesn't come out perfect. Is this because I am such a better cook? Is it because I've tried and failed more times? I don't think so. I think it really comes down to understanding a few tenets about how food operates and therefor have a greater chance for success. Cooking is really only about controlling two things, Temperature and Moisture. Temperature Say you have a red hot burner and you put your hand on it. The heat that is contained in the burner is transferred into your hand and you feel hot. Conversely, if you grab a cold glass of water, the heat from your hand quickly travels into the glass and you feel cold. Make sense? Heat works like osmosis, it travels from a place of concentration (a hot thing) to somewhere with less (a cold thing). Seems rudimentary but here's where it get's interesting. When heat moves, it follows the exact pattern every time. It's like this. You have a full glass of water (this represents heat). You take it and pour a quarter of it into an empty glass (this represents a cold place, more aptly though a place with less heat). The water from the full glass is diminished by entering into the empty one. This is just like heat. When it travels from a place of concentration, the source then contains less heat. Here is why this is so important to cooks. If you are going to pan fry a steak and you drop it into a hot pan, it is going to brown but when you try and flip it and put it back in the same place it takes longer to brown. This is because much of the heat from the pan has entered the steak and it takes longer for the pan to heat back up. A more simpler example might be making hard boiled eggs. When you drop them in the boiling water, the water cools and temporarily stops boiling because of the temperature of the eggs. Understanding how heat works is one of the most important elements of cooking. It takes time and observation to learn it's quirks. However once you do you will be able to predict results and troubleshoot problems. Things like: "How much food can you add to a pan at one time?" or "Is this skillet too hot for these onions and will they char instead of sauté" or "Is the volume of my sauce too much for this pot and the bottom is burning while the top is lukewarm?" Pondering these things while you cook will help you to get a more realistic understanding about this physical property. For more info on it, research the principle "the conservation of heat." Moisture Control The other fundamental of cooking is learning how to control the flow of moisture in a dish. It works hand in hand with the property of the conservation of heat because temperature change immediately effects liquids. All things contain various amounts of water; from steaks to greens to mushrooms to pomegranates. It is how you control that moisture which will dictate your culinary success. Water can be a very difficult element to control. It can have very positive or very negative effects on what you are preparing. For instance, if you are trying to cook a perfect over-easy egg you would want to drop a tablespoon of water in the pan and cover it to lightly cook the top. However, if you added a cup, the water would draw all of the heat from the pan and your eggs would be a mess. Or, if you add too much liquid when you are braising (and the meat releases it's own juices) you might boil the meat instead of braise it (shoe leather anyone?). Observing how moisture affects cooking is not easy but in reality that and heat work together. Watching how they interact with one another is a great benefit. It could tell you why your greens didn't wilt properly or why the pancakes burned or why your chicken-fried-steak chews like a dog toy. I would encourage anyone seeking to become a better cook to work this observation process into your food preparation ethos, you will undoubtedly hone your craft and produce higher quality food. Braising. Man, I can only think of a few other techniques that have been so horribly bastardized. When people think of cooking slow and low, usually they take a hunk o'meat and throw it in the crock pot all day covered in water. The end result is often an overly tough or slimily moist mystery. But braising, oh buddy, braising is special. The principle is not all that different from crock potting but the end result isn't even in the same league.
At the core of braising is cooking with a low heat for an extended period of time (usually 250-300 degrees for 3-4 hours). It is the same principle actually as slow barbecuing. You want a slightly moist heat. This technique has been used for hundreds of years to make lower quality cuts more palatable. But we're not doing this just to use up that freezer burned chunk of chuck in your freezer. No way, braising can produce flavors and textures that you only hope you could taste let alone reproduce. And guess what, you can. Even better? It's actually quite easy. Imagine a pot roast that you can cut with a fork AND slice with a knife (and have it not fall apart) all the while being perfectly juicy and tender. Or a weird cut like oxtail or shanks that is impossible to cook any other way and comes out so rich that you'll get all poetic at the table. So here's the rules, just don't violate them and everything will come out peachy. 1) Slow and Low - Just have to reiterate it, it's kinda integral. 2) Sautee your cut and veggies - this produces "Fond" or the tasty charred bits at the bottom of the pan 3) Deglaze (add liquid) - bring to a boil to release the fond. Reduce to half (this is your brasing liquid) 4) Cover and Cook (yup you guessed it) Slow 'n' Low. The end result can be devoured right off the bone, or pulled off and shredded for sandwiches. Give it a try, you'll be so happy you did. |
Archives
March 2012
Categories
All
|
 RSS Feed